Showing posts with label budget. Show all posts

Monday, July 15, 2013

He already has his shirt off

Today our slab was poured!!! As we predicted, we couldn't get it done as soon as we had hoped, but we were able to schedule for today and luckily the weather cooperated (for the most part - it is really super hot...). Meanwhile, it was okay to have a few days to wait, because that allowed us to implement some extra precautions the mason suggested, such as adding even more bracing to the forms. We also cut up an old hose into small pieces, put duct tape over one end, and put them on the j bolts as little caps so that the threads don't get damaged or dirty. (This was part of our original plan, but at least some of the pressure was off to get it done quickly.)

One of the concerns we were told, however, with scheduling for a Monday was, "I'm not really sure how many guys I can get." We weren't sure what that meant, so we rounded up as many troops for today as we could - myself, Matt, his sister Brigitte, their dad Bob, and my dad Al. We were a little nervous, especially because making a nice smooth slab seemed like it would be pretty different from pouring the footers, and by 7:05 AM there was only one man on site. But within minutes, a parade of pickup trucks arrived, followed closely behind by the first concrete truck, and then things were on their way:


Enough crew showed up that our participation was actually completely unnecessary (which was a bit of a bummer for us), but we stuck around to witness the process and take pictures. See them after the break...

Tuesday, July 9, 2013

You remeshin' with me?

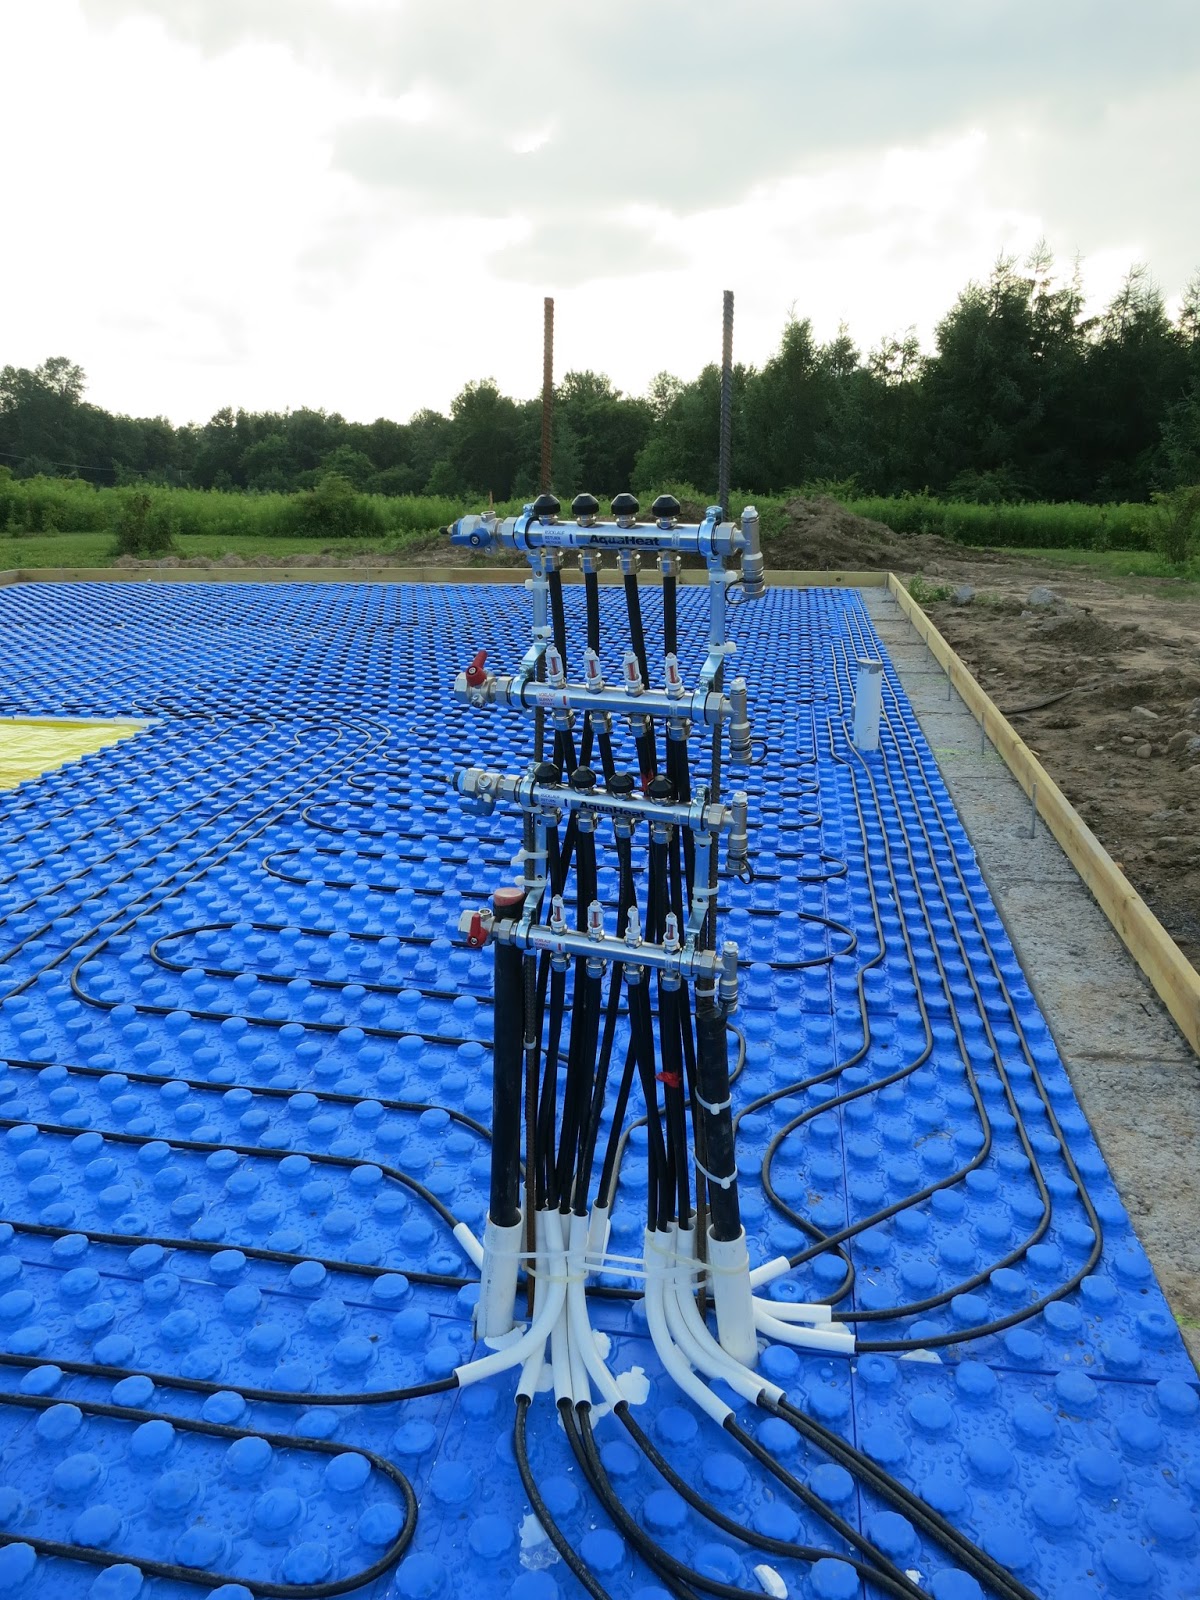
Remember how I said yesterday that the rest of the materials were scheduled to arrive this morning? Well, apparently "morning" means any time before noon, which actually turned into 1PM before anything arrived!!!!So the Roth guys were hanging around for 4 hours this morning with nothing to do. I find this totally inexcusable, but I wasn't there to lay down the law (luckily for the delivery guy). Anyways, once the materials finally showed up, the Roth guys got to work and were able to complete laying the pex tubing today. They also connected all the tubes to a manifold, pressure tested them, and left them pressurized.

The living areas are now complete.
This is the manifold which will live in the utility room - pretty crazy, huh?
All done!
We then laid out plastic over the garage area, both to act as a vapor barrier and to prevent the concrete from seeping into the gravel too much when we get the slab poured. We used scrap pieces of plastic - whatever was left over from wrapping the footer foam, empty trash bags, plastic wrapping from large appliances, and my old original Wham-O Slip n Slide from when I was a kid (*sniff.... I shed a little tear for that one. All in the name of recycling!).

My dad got a head start on laying steel remesh by starting on the end that already had the pex tubing all done and working in tandem with the Roth guys. Once Matt and I showed up after work we helped with the rest.


This was a pretty easy task, but it still ended up more complicated than I imagined. We made sure to bend up the sharp ends of the steel so that when it was laid down there was no chance of puncturing any of the pex lines. Each of the pieces of remesh then had to be tied together with zip ties (which then had to have their ends trimmed off). Also, there was a bunch of cutting that needed to be done so that remesh could be laid around the drains and plumbing. Overall this wasn't difficult, but it was a bit tedious. We managed to get it done pretty quickly, at least.

All ready for a slab!
Tomorrow our mason is scheduled to stop by to check in on our progress and look it over, and we will get the slab pour scheduled. The weather is looking really fantastic for the rest of this week (0-10% chance of rain each day), so we're hoping to get him scheduled right away! Unfortunately I am concerned that this might be too short notice, especially with the back log of work I'm sure he is dealing with. We'll see.  

Updated budget:
+ $373.65 for 47 steel remesh sheets
TOTAL SPENT SO FAR: $47,047.45

Sunday, July 7, 2013

Must... remain... productive...

Although we're at a bit of an impass since we still have to get the radiant floor piping laid by Roth before we get the slab poured, we managed to do a little more work this weekend. The first thing we did was build up the next layer of the forms. We used the 2x6's that had been the insides of the footer forms and stacked them on top of the outside forms, which were still intact and anchored down with the long stakes. We also used this opportunity to recheck level. It turns out we were a little slumped in the middle of the 64' spans, probably due to the kite string sagging. Luckily we are able to make up for that our final forms, and it's much easier to check if these are level since we have a nice sturdy surface to put an actual level on. We then nailed everything together and stuffed any open cracks with some foam.


We then measured out where interior walls will eventually go, and spray painted them with neon green spray paint. Not only does this help us imagine what the floorplan of the house is going to look like, it will also be helpful when Roth comes to lay the heating pipes, since different rooms will constitute different heating zones that can be turned on and off.


We also added thermal breaks around the perimeter for where doors are going to go. It is unwise to have the slab too close to the outside as there is the potential for major heat loss, so we added in a few inches of wood at the doorways as an extra break. Basically we measured some 2x6's to be the width of the door openings, and nailed them all together.

These are the thermal breaks at the garage doors and front door.
Lastly, we prepped our drains for the slab pour. We stuffed them full of spongy foam, and then cut out solid foam caps of the correct diameter which we then duct taped over the tops of the drains. (These make a great percussion noise when you tap on them.) We also laid a wooden box in the area where the tub drain pipes will eventually go, so that that space will remain free of concrete until later when we install the tub.


I guess now we'll just relax for a few days while Roth comes in and does their work! It is difficult to be patient and wait on other peoples' schedules. But we will at least be busy with making phone calls to our mason to get the slab pour scheduled. Hopefully he's available when we'll want him - with how terrible the weather has been this summer, I expect he is very busy catching up on projects.

Updated budget:
Still the same, because all the wood used for the forms and thermal breaks was reused from before!

Friday, July 5, 2013

Compact(or) Parking Only

Yesterday we finished spreading and leveling the gravel that arrived Monday.  We started using the borrowed compactor but had a little issue. First we had to scramble to try and find a filter for it, because the one we had with it was caked with dust.  It also seemingly turns out the compactor doesn't like running on water puddles, which with the way the weather has been this summer is unavoidable. Unfortunately that put too much strain on the belt, and we killed it.  So, luckily, Weider's Hardware was open (even though it was a holiday), and they had a rental compactor for about $35 for a day. We quickly snapped it up and got to work.  

Matt Running the Rental
Nice and Flat
All done with the gravel!
You can see that the garage area is raised up a little from the rest. This is because we won't be getting radiant heat in the garage, so we won't have pex tubing laid there. So, there is extra gravel to keep everything level once the slab is poured.

We worked our butts off to get everything done yesterday because we had expected the guys from Roth Green Energy to show up today to start installing the radiant tubing. Unfortunately, we found out this morning that another job ran over (gee, it couldn't have had anything to do with all the rain we've been having, could it? What a summer...), so they couldn't do it today.  Hopefully next week.  But the work will not stop for us, as we will spend this weekend building forms to prepare for pouring the slab.  It's all Up from here!!!

Updated budget:
+ $35.00 for 1 day compactor rental
TOTAL SPENT SO FAR: $46,673.80

Tuesday, July 2, 2013

It's Looking a Little Grave....ely Out Here

Monday afternoon (~1pm) the gravel arrived to set the base of our slab.  Matt had to work until later in the afternoon so it was Bethy operating the tractor and starting to spread the gravel.  To help keep the dust down we obviously planned on doing it on a rainy day (hahahahaha noooot); the rain was consistent but not heavy, so the work continued. 
Bethy moving the gravel!
Al was working on the sewer pipe layout that would be installed under the slab. The toilet flange, utility room drain, and bathroom shower drain all needed to be glued up and buried in a trench before we laid gravel and poured the slab. Bob showed up and helped with digging for the sewer pipes and spreading the gravel.  Just before the final truck load of gravel showed up, Matt arrived and took over tractor duties so that Bethy could get back to work. 

Matt takes a turn on the tractor
Josh arrived shortly thereafter and helped dig for the sewer pipes as well.  As Matt continued spreading and starting to get an even edge, the pipe was being glued up by Al, and the majority of the trench for the sewer pipe was dug by Josh and Bob.  

A clean pipe is a happy pipe
However, as we were just starting to see real progress, the skies opened up and the rain became so heavy that we had to call it for now.  We waited in our cars for a short while, but when the rain hadn't stopped we called it a day.
About how we left the site the first day

Tuesday afternoon, with a relatively dry forecast, Matt and Al got back to work.  Matt continued spreading gravel and starting to achieve final grade with the help of some string lines and a level on a stick.
Not too level yet, but we're getting there.
Al continued trenching and gluing up vent stacks.  Bob arrived as well to help with the trenching and cleaning/gluing the pipes.  The pipes were finally all set when we realized that the inspector would need to come out and see them before we buried them, so we gave him a call and he arrived later in the day.
North wall waste lines
Nice Pipes!!
Once we got the OK from the inspector we began to bury the pipes under dirt, taking care to tamp down in small layers.  We then got out the compactor which we borrowed from Matt's uncle Ace (Thanks, Ace!!).  We got it up and running and tested it out to see how much compaction we would get and thus what level we really wanted to be at before running it. 
Testing out the compactor.
We didn't get done completely leveling the gravel, but we like the results with the compactor, so that work will continue later this week. Looks like we'll be working through the holiday!


Updated budget:
+ $320.09 for various plumbing supplies
+ $988.20 for 3 trucks of #1 gravel, 14 yds each
TOTAL SPENT SO FAR: $46,638.80

Sunday, June 30, 2013

The big reveal!

This might be the most disappointing blog entry yet, since I named it "big reveal" but I reveal nothing by way of pictures. Sorry, we lapsed on photo documenting duties this weekend! Nonetheless, that doesn't make our work any less noteworthy.

Matt and I both had Friday off of work (our 5 year wedding anniversary :-) ) and we used the morning as an opportunity to do a little work on the site. Unfortunately there was rain on and off, but we managed to make some progress since we knew we were going to be away for most of the weekend, and gravel comes tomorrow (Monday). The "big reveal" I alluded to was removing the inside of the forms to see the set concrete footers, woo hoo! This was exciting for us to see, particularly because it is our first above-ground structure (soon to not be above ground anymore, but whatever); however, it really couldn't be much more underwhelming in pictures, so we didn't bother to take any. With some help from our friends Mark and Josh, we hammered some very archaic-looking cut nails from the outside wooden forms into the footers to help keep them there, since they will purposefully remain as part of a thermal break (along with more foam to be added later). After another rainstorm passed, we then did a little backfilling so that the gravel truck could pull up as closely as possible to the middle of the work area; and then we cleaned up the scattered tools, containers, and trash from around the site. From there Matt and I took off for our anniversary weekend.

This morning we decided we wanted to get back so we could do more prep before the gravel gets delivered, so we drove back to the site and placed two geothermal pipes that were given to us by Roth Green Energy. Previously we put conduit into the footer trenches so that we would have a place to feed this pipe through once the footers were poured. We placed these pipes through the conduit, packed in any empty space with foam, and then called it a day because it turned out to be incredibly hot and we were tired. We meant to also dig a trench to lay the sewer pipe, but decided we could do it later.

Okay so this wasn't a very exciting update, but things are sure to get exciting again soon, because gravel (for under the slab) arrives tomorrow! Here's hoping we have good weather, though the forecast is a little iffy. It seems to be anytime we schedule a gravel delivery, it rains.

Updated budget:
+ $13.96 for cut nails
TOTAL SPENT SO FAR: $46,652.76

Wednesday, June 26, 2013

2 Chutes, 5 Slump and you will be a Pro

So over the weekend, after we got the forms done on Friday 6/21, we marked out doors, placement of J-bolts, and laid out conduit for our septic, water and geothermal. The doors were marked out so that when the footers get poured, we could take care to smooth out where our wooden threshold/thermal break would go.

Luckily we only had to install a 2ft section of the septic line to give us enough bite on both sides to attach to the interior plumbing and septic tank outside.  For the geothermal we used a couple of 2in PVC pieces down about 36in in the trench.  For the water inlet we put a 3in piece of PVC at an angle so that it would be just inside the wall at the floor, and close to the bottom of the footer.  

We cleaned up the site and moved dirt around so the concrete trucks would be able to drive clear around the forms.  We also installed some scrap pieces of wood, carpet and plastic to cover any holes on the inside of the form and prevent concrete from spilling out. The earliest we could schedule concrete for a morning pour was Wednesday (today), so that's what we planned on.  
 
This morning the first truck arrived right on time, at 9:00am.  The guy first asked "Has anyone run a chute before?"  We all looked around at each other and made a rather awkward gesture to Al, who last poured concrete at least 20 years ago.  Well then everyone pointed at Matt to be the guy to do it.  So the driver was nice enough to give us some pointers.

Matt and Bob (Matt's dad) getting a lesson on how to run a chute!
He asked what mix we would like ("You ordered a 4 slump but 5 will flow a little better"). Asked how many chutes we wanted, "Two I think...".  He showed Matt and Bob the proper hand signals for starting, stopping, up, down and forward.  And then we got to pouring.....


You'll notice in these videos that when it comes to construction attire, Matt goes for full coverage based on scary stories that he heard... Bob (Matt's Dad) goes for mostly covered because he didn't know one way or the other... Al (Bethy's Dad) goes for no coverage because he has had only good experiences with concrete. TEHO. 


The plan was for each truck to slowly drive all around the perimeter while pouring to make one layer, which will set slightly in time for the next truck to arrive and do the same. Matt took charge on the chute, while Al helped spread things in the trench, and Bob helped shovel off the chute. Bethy filmed and filled in as needed.


The first truck was done in just under an hour, after which he cleaned up off to the side and the other truck showed up shortly after he left.  His parting words were, "Tell him you want 2 chutes and about a 5 slump and he will think you're a pro".  Thanks, first driver, for all the helpful hints and tips!!

The second driver...we'll just say he is used to more of a dump job, but we were able to accommodate, building on all our experience mere moments before.  He got around in about 35min, and just as he got done cleaning up the 3rd truck showed up.  This was the slightly more critical pour because we wanted to fill up just to the top of the form, no more, no less.  We also had to start placing the J-bolts as the concrete began to set, but of course Al wasn't going to just throw them in; he had quite the plan, which involved using his homemade fixture to place them at the proper depth, centering and angle.

Al and his precision J-bolt placement mechanism
Using the precision J-bolt placement mechanism to ensure proper placement (against the back), depth (line up the top of the bolt with the top of the mechanism), and angle (make it straight against the mechanism).
The third truck went around and actually ended up having a little extra concrete (~2yds), so we had him fill in some low spots in the driveway!

Bethy was our master screeder (yeah I kinda made that word up) and had made it almost all the way around, when the mason we were hiring to pour the slab showed up to check out the site, and even lent a hand screeding off the last little edge of the footer.  He was pretty happy with what he saw that day and sounded up for the job!

All poured
That inside form is a little wonky, but that's okay.
Well we got done around 12:30 and relaxed in the sun watching our cement cure.  We looked over the forms and all in all they looked pretty damn good on the outside edge.  A couple inside edges went a little wonky but the forms did what we needed.  Next steps are to lay the waste lines, install the geothermal inlet and outlet, and smooth out gravel and compact it.  But not today, for the rest of today we relax and celebrate our hugely successful and exciting footer pour!

Updated budget:
+ $3389.04 for 3 trucks of 9 yds concrete each
TOTAL SPENT SO FAR: $45,330.51

Friday, June 21, 2013

Literally in the Trenches

Yesterday, Thursday June 20th, we finished the last little bit of digging (~18ft on the west side) the trenches.  It was just Matt and Al, leveling the bottom of the trenches and beginning installation of the concrete forms.  The trenches are approximately 1ft wide x3ft deep, but the total footer without slab is supposed to be 42in, hence an additional 2x6 above the trench.

Our design for the forms was to have a tall post in the trench every 4 feet that holds the outer 2x6 at the correct height. The 2x6 is then braced by a stake towards the inside of the house, to give the correct outside dimensions and level of the house. Off of the brace we then hang another 2x6 to form out the top of the footer.

The insulating foam board (that we wrapped like presents) is then  installed behind the long posts, under the outside 2x6.  Later on we will add an additional 1ft piece of foam outside the forms for a total of 3ft x 2in of foam below grade.

We used a string held taught at the 4 corners to gauge our height and width.  The corner marks were based off of our first level sighting using the water level.  Having done many second checks we found the strings to be right on the money.

We knew, despite the water in the bottom of the trench, that we were on firm ground because when we went to drive in the first few posts that hold up the forms they only went in about 2in.  Given that the post only has to hold up the form we figured this was good enough.  Once we put in the first full 16ft length we seemed to get in a rhythm and got about halfway around the house before the day was getting long. 
Northwest Corner, halfway there...

Matt's satisfied with the progress

Looks nice and straight too!!!

Today (Friday, June 21st), feeling a little worse for wear on Matt's and Al's side of things, we got to work finishing what we had started the day before. This time Bethy was down too so we knew we could finish the whole thing.  We all got hard to work and the work passed swiftly.

A little after 3, as the end was in sight we decided to call the building inspector to have him come down and take a look at our progress and give the go ahead to pour the footers.  We finished up, did a little cleanup (including getting out more water) and waited for him to come around. 
Bailing water out of the trenches.
We got him down there and his first words were 'It's too clean looking', always good to start off on the right foot.  Again he wasn't too concerned about the amount of water we had. He took a walk around, asked a couple questions about the dimensions and then signed a paper saying that we could proceed to the next step. 

All done!
Unfortunately we were slightly unprepared for the finished state of the forms because we had not yet called in for concrete.  Oops.  We quickly learned that everyone was already booked for the weekend and the next soonest would be Tuesday.  (We also learned you may as well book concrete and then cancel the morning of, rather than ever wait again).  So great progress but not so good foresight.

Updated budget:
+ $523.79 for 12, 2x4x8 Dow Scoreboard footer foam
+ $59.99 for a 100' roll of 12' wide black plastic (used to wrap the foam)
+ $27.82 for 2, 5lb boxes drywall screws
+ $124.00 for 50, 8' 2x2 stakes
+ $373.76 for 32, 16' 2x6 boards
TOTAL SPENT SO FAR (plus applicable taxes): $41,941.47

Monday, June 17, 2013

If I had a Hammer...

I might need better insurance for the carpal tunnel that I would get from hammering in all the nails we need to build the walls.  Oh so for those of you that don't know, when my father-in-law saw the final cost of what it would be to "Panelize" the walls before delivery to the site, he said "Walls aren't that hard to build."  But since each wall will need a minimum of 50 nails per 4x8 sheet we decided it would be smart to get a nail gun! (ooooh aaaaah)

One afternoon while I was just blowing off time I went around to all the tool places that I could think of.  Harbor Freight, Lowes, Sears, Home Depot and such.  For a nail gun I was looking obviously at a pretty heavy duty Framing Nailer, which would also require an air compressor and various other attachments to make sure it is lubricated and stays in tip top shape. 

The framing nailers that I saw at Harbor Freight were pretty cheap but I started thinking about how many nails we were really going to have to drive, it would be fine maybe if we were building a shed but for the house...maybe not.  The consideration that we would be using it like a commercial builder for a couple weeks straight then lead me to the selection at the big box stores.  It's pretty much the same at each one and you have a higher price point than HF obviously, but in this case I would pay for quality, because we could always sell it off afterward.  The one that caught my eye was the Hitachi Framing Nailer.  It is a good price and has great reviews online.  Seems like the one I will pick up.

Next is a compressor and I wasn't overly leaning one way or another.  One thing I did learn is that if you are doing heavy work (like framing a house!) you need a compressor with at least 4.5 cfm capabilities to save time and have the nailer works correctly every time.  Most compressors that provide that kind of flow have either a larger tank or higher price tag.  I think on this one I will go with the HF.  A compressor can come in handy for a good many things so I wouldn't mind keeping this item. 

Well that's all for this subject, let me know if you think I am on the right track with my thinking.  It gets a little daunting when you are walking through the aisles looking at all the different pros and cons of each tool. 

Tuesday, June 4, 2013

Building Permit: RECEIVED! Time to prep the site.

As the title of this post implies, as of May 30 we now have our building permit! HOORAY! Now that we finally have the go-ahead, we have begun work marking and leveling the site.

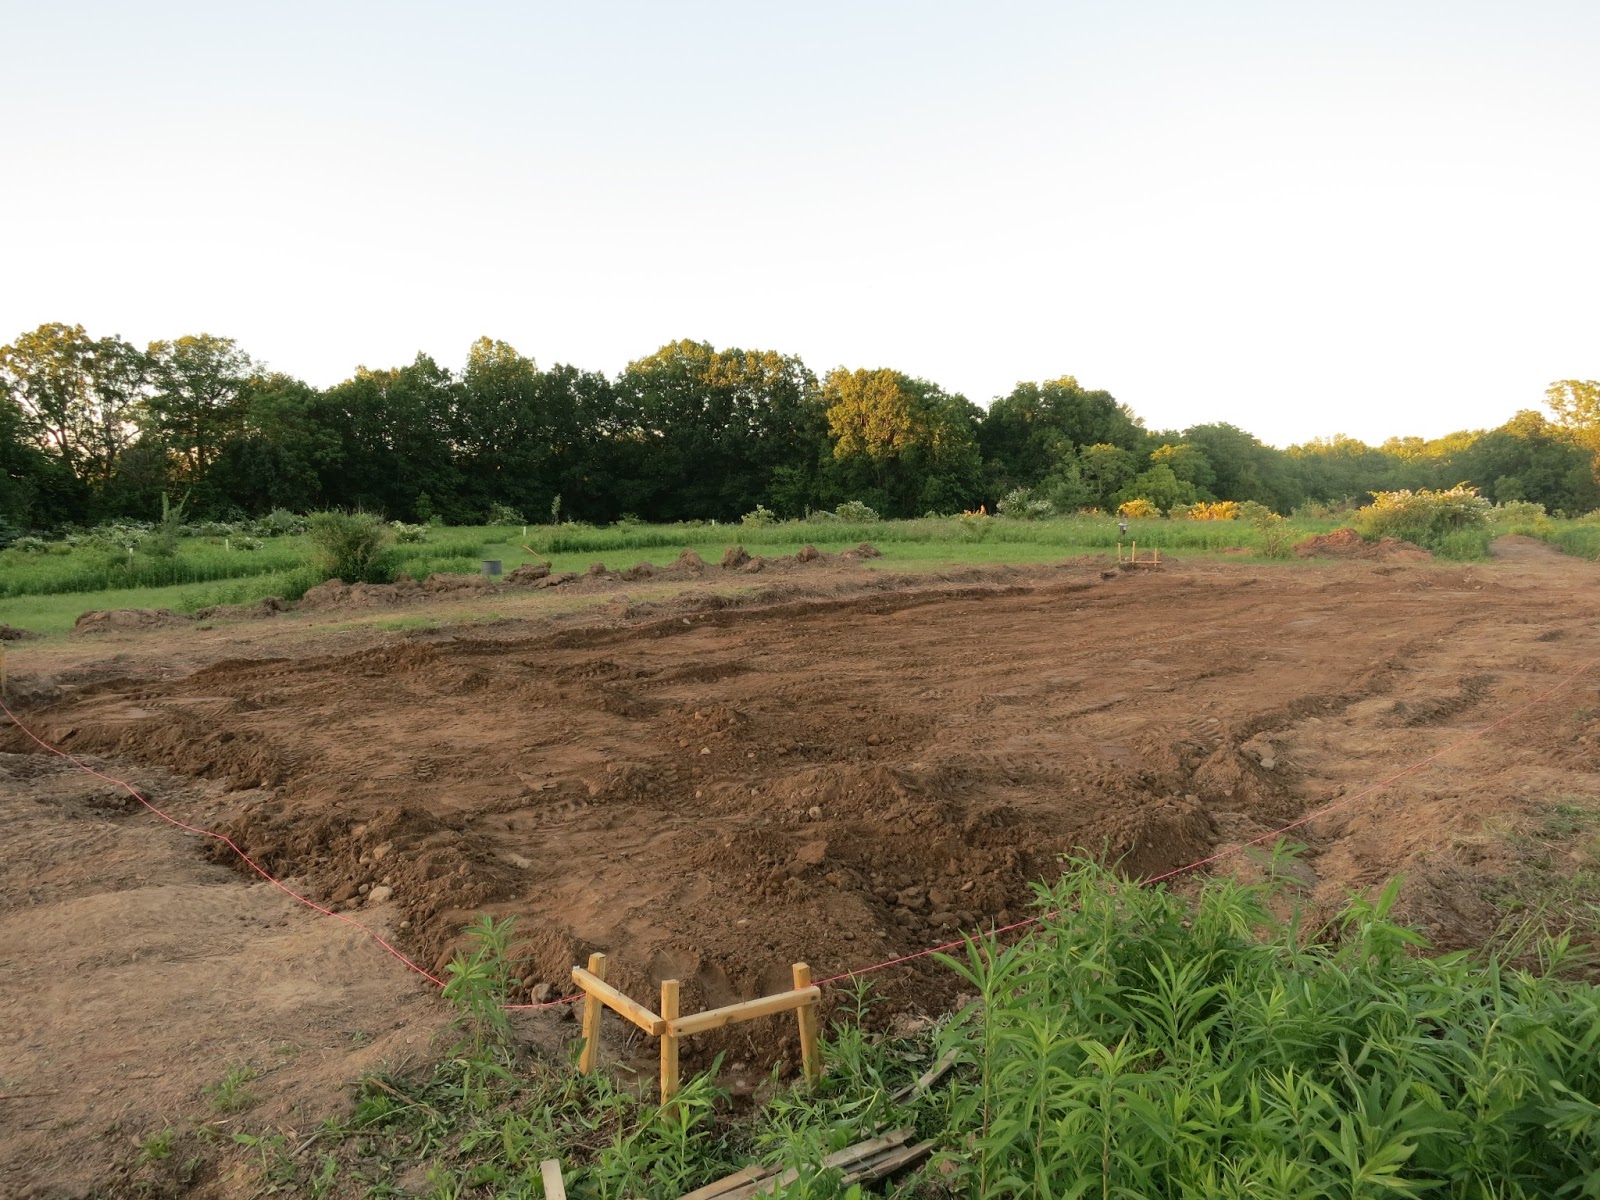
We started out simply by scraping away topsoil around the approximate footprint of the house. (You can see we have also had a bunch of lumber delivered for forms we will eventually build for when the footers are to be poured.) Next we placed stakes at the corners of the house, which we made sure were accurate by measuring lengths, widths, and diagonals.

That makes it sound nice and easy to place the corners, when in fact it was a lot of work, particularly because we want to make sure we are oriented as correctly as possible to solar south for when the solar array is installed. We used several different methods to make sure our alignments were correct: aligning to the shadow of a long (over 15'!) vertically level stick at exactly solar noon (as determined from sunrise/sunset times on a given date... but even those aren't entirely accurate due to varying definitions of true sunrise/sunset); measuring against magnetic north using the correct declination as obtained from the NOAA website; and even a little experiment using a giant pendulum. It turns out that all these methods were accurate to within about a half a degree of each other, and we couldn't really hope for better accuracy than that. After initially placing the corners, we hung string to make sure we were aligned to solar south and made adjustments as necessary until we had the most accurate and agreeable lengths, widths, diagonals, and alignments as we could realistically achieve. Phew!


Now that we have the corners determined and the site relatively level (by sight only at this point), the next step is to determine what's truly level. We will do this by using a water level, which works on the principle that water always tries to find its own level. By filling a large bucket in the center of the area with water and filling a flexible tube with said water (with absolutely no bubbles), we can mark the water level on the tube and use that to determine a constant height in each of the corners. And, voila! We will have a level plane to work from. After that, we'll use the plane to mark out trenches and START DIGGING!

Updated budget:
+$504.80 - $10/sq ft for the building permit fee plus a $300 recreational fee
TOTAL SPENT SO FAR: $40,758.09

Wednesday, May 15, 2013

Getting Stoned

Well I probably jinxed it with my last post, because of course our stretch of beautiful weather broke and we got rain right when we were scheduled to get gravel delivered. And, it was a lot of rain, so of course that area near the road that I was afraid would get all muddy got hopelessly soggy and slippery. The gravel truck arrived last Thursday and before pulling in, the driver walked over to express his doubt on account of the weather. (He also took a moment to doubt the ability of our tractor to effectively spread out the gravel between deliveries - "You're going to do it with that?! Oookaayy...." - Needless to say, we did not appreciate this unnecessary negative sentiment.) However, we figured with his heavy truck and huge tires, he ought to be okay. He pulled in and dropped off one load, and based on how that went, we figured we'd go for a second. Unfortunately, on his way out he got stuck in the slippery mud, and for a few moments were were concerned that we would have a huge truck stuck at the entrance to the driveway. Thankfully after gently rocking forward and backward enough times he eventually made it out. Matt got to work with the tractor while my dad and I used shovels to help spread the gravel, obviously concentrating on the puddles and extremely muddy areas first. For having ordered 4" bank run, a lot of those cobblestones were considerably larger than 4"...

After about 45 minutes we had the first load spread out, and we were left waiting for the next load (take THAT, non-believing truck driver!). While this load was delivered much more effectively than the first thanks to the new layer of gravel we had just leveled out, the driver was not confident that we would have continued success, and told us we should wait until the weather improved and things dried out. Drats. We leveled out the second load and called it a day, and once again we were left waiting.

The rain eventually tapered and we were able to schedule the remaining deliveries for today. This time, instead of dumping all of the gravel in one pile that needed to be spread out, the driver started at one end of the driveway and slowly dumped while driving. The hatch of the truck had a chain on it that only allowed the door to open so much, so that the flow of the gravel was rather controlled as the truck rolled along. This left very little work for us to then have to do, other than some minor leveling out and a whole bunch of driving back and forth to help pack the gravel down. And by "us" I actually mean Matt and my dad, as I was unavailable, so it's a good thing that there was less work to have to do this time.

So now we have a driveway!....mostly. We still don't technically have an approved site plan, so we still can't get the driveway permit that would allow us to complete the driveway where it meets the road. But for now, at least we have a "paved" pathway that will allow us to drive in and out from the site without getting stuck in the mud anymore. Progress!

Updated budget:
$370.00 - Rush Gravel Corp. 2 trucks of 12 yds #3 gravel
$555.00 - Rush Gravel Corp. 3 trucks of 12 yds #3 gravel
TOTAL SPENT SO FAR: $39,253.29

Wednesday, March 20, 2013

Site Plan Hearing

Last night our site plan went before the Town Planning Board for approval. Prior to tonight, a couple committees as well as the town engineer reviewed the plan and made comments. Those were then reviewed by the Board in an open forum. It was very interesting to witness this process, which took some time but was very exciting for us nonetheless. Overall the review of our plan was relatively uncomplicated, but there were a few notes requiring discussion:

  • The fire district recommend a sprinkler system because of distance from road and lack of water source. After some discussion we decided this was unnecessary.
  • Requirement of drainage easement means and bounds map because of stream on property
    • Do we need a description of corridor or a detailed survey? 
    • A detailed survey would be exceedingly difficult (and expensive and inaccurate) because it is a meandering creek
    • Description would be good enough.
  • The Conservation Board asked, "Will it be a modular house?" - and no one knows why.
  • The Conservation Board also noted that the "sensitive areas" (farms, etc) listing was missing, while in fact it was included and for some reason they just overlooked it - and again no one knows why.
  • Steep slopes need approximate labeling on the plan.
  • Must edit note about visibility from driveway to agree with Dept. of Transportation assessment.
Besides all of that, the Board found no issue with our plan. So after our discussion they moved on to what was next on the agenda, and we had to wait until the end of the meeting to get our ruling. All in all:
  • No futher environmental review
  • Must make updates to comply with town engineer comments (need easement language, steep slope labeling, etc.)
  • Must also comply with Monroe County Department of Planning & Development comments, when received
On those conditions, our application request is approved! So moving forward, we have to wait for our surveyor to make some updates, and for the Department of Health to approve our plan, and then we should be able to get our subsequent permits (driveway, building, etc) after all the necessary signatures. I fear that this may be a long process despite sounding relatively straightforward, especially considering the fact that it has taken months to even get to this point. Thankfully, we don't need another review at a Town Board meeting, which is welcome news since you have to wait one month from submission to actually be reviewed (i.e., our plan was actually submitted back in February, and wasn't on the agenda until now in March).

Overall, the meeting was very interesting, and it was very nice to meet the gentlemen who sit on the board. They were very friendly and welcoming, and actually seemed rather excited about our little project. In fact, one member of the board also has geothermal, and was very excited to tell us how great it is - and it turns out, his was also installed by Roth Green Energy! He is very happy with it, which is reassuring for us (not that we had any doubts). All in all, an encouraging and exciting meeting - we can't wait to get moving! But for right now, we still have to...

Updated budget:
+$125.00 - Rush Planning Board Site Plan Hearing Fee
+$300.00 - Monroe County Department of Health site plan review fee
+$50.00 - Monroe County Highway Department site plan review fee
+$3,265.00 - Balance to surveyor
TOTAL SPENT SO FAR: $36,328.29

Friday, March 15, 2013

An inadvertent head start

In the conclusion of my last post I pretty accurately predicted what ended up happening today. Yesterday we got a flyer in the mail inviting us to a "private sale only open to preferred customers" at Charlotte Furniture and Appliance. Although it seemed like a gimmicky promotion, everything in the store was promised to be on sale up to 50% off so we figured, why not check it out? My mom sent my dad out with a shopping list, and we met up to check out the offerings. While the visit was initially meant only to replace my parents' broken oven (as well as replace their toaster oven and microwave with an over-the-range (OTR) convection microwave like I mentioned in my last post), we ended up going whole hog, as my mom would say. She sent me with a couple secret messages that if they had good deals on refrigerators and dishwashers, go ahead and get those, too (all of my parents' appliances are 20+ years old). But it's not only that - Matt and I ended up getting all of our appliances, too. Say what!

As we were helping my dad with picking out an oven, we mentioned to the salesman that we were also looking for ourselves for down the road. The salesman said that they can hold appliances for 6 months, or even longer if necessary, all it takes is a phone call. Bingo! The oven/microwave combinations we were looking at ended up meeting both my mom's and our needs, so that got two birds with one stone, as did the dishwasher they had on special. We also went with the fridge, washer, and dryer they had on super special, seeing as how we were not picky on any of those appliances (like I outlined in my last post). Below is a list of what we got; you can click on the linked name to see the detailed specs on each appliance.

Maytag MIR8890AS Freestanding Induction Range - There really aren't that many induction ranges out there, and this is pretty much the only affordable one with a coordinating OTR convection microwave. Plus, this Maytag range is designed, engineered, and assembled in the USA.

Maytag MMV6186WS Convection Over the Range (OTR) Microwave - This is the convection microwave that matches the range, so - sold. (You want the range and microwave to coordinate because otherwise the finishes won't match and will look goofy. Since induction ranges and convection ranges are high-end, pretty much all of them are stainless steel; so, we didn't have a whole lot of choice here to get a convection microwave + induction oven.) It's not made in the USA, but apparently NO microwaves are.


Maytag MDB8949SAW Dishwasher - Basically we went with this dishwasher because it came at an incredible value. It washes dishes and is energy star - the end. It does have some sweet features like an adjustable height top rack, a split silverware basket for flexibility, and an auto clean cycle that gauges how dirty the dishes are so that resources aren't overused. The tub is stainless steel which apparently attracts condensation and improves heat retention, improving performance overall. It also has steam settings that we'll have to look into more. Even better, this is another appliance designed, engineered, and assembled in the USA. We got white because we are planning white cabinets and didn't care to pay more for either hidden controls or stainless steel, both of which would be unnecessary expenses.


Amana AFD2535FES Refrigerator - This was basically a 36" french door fridge at a special closeout price, so - okay. We get an ice maker which is bonus, and inside there is a little spout for cold filtered water. I'm not sure how efficient that water spout really is, to have to hold the door open to get water, but we;ll see whether we ever use it or not. Upon further inspection there are some spotty online reviews regarding reliability (people either love it or hate it), and I'm not sure whether the fridge is actually energy star certified. However, it is listed as consuming 505 kwh/yr, whereas comparable refrigerators that are energy star are rated anywhere from 473 to 551 kwh/yr, so I'm not sure that it's a problem. We didn't intend to get stainless steel, but it was actually less expensive than its black/white counterparts, so we went with it. However, given the reviews and questionable energy star status, we may go back to ask about other refrigerators; or if it's too late to switch, we will ask to add the extended warranty (which we initially declined but I expect we can still get since we haven't actually taken possession yet).


Frigidaire FAFW3921NW Washer and FASE7021NW Dryer - These were another case where there was an incredible bundle deal. We said, "Efficient front load washer and dryer" and these fit the bill. Sold. Apparently the washer comes with an energy saver mode and was named Energy Star Most Efficient 2012, so that's gravy.

Overall, we feel super ahead of the game, but we are very glad we went ahead and purchased all of our appliances today. For one, it's one less thing to worry about; and secondly, from what we can tell from online prices (not even retail, which in almost every case was a couple hundred dollars more), we saved over $1,000! Or rather, we will once we actually fully pay for them. For now we put down a 50% deposit, and then we pay the rest upon delivery. And, we actually get a price guarantee from now until 30 days after delivery, so we can feel safe knowing we got phenomenal deals. No wonder Charlotte is an 11-time winner in the D&C Rochester's Choice awards. And I suppose it goes without saying it felt like a lot of fun to go on an appliance shopping spree! The only downside is having to wait to be able to use any of them...

Updated Budget:
+$2,000.00 - Down payment for appliances
TOTAL SPENT SO FAR: $34,588.29

Tuesday, January 29, 2013

Well done!

Today we got our well drilled! For a while it was actually TOO cold but finally the weather cooperated and the conditions were good enough to move forward. Matt and I only got to witness part of the drilling but it was a fascinating process.

This huge rig started out horizontal and then moved up to a perpendicular position.
The drilling is about to begin. The rig is like a 6-shooter; there
are several ~20'  shafts. As the drill gets down, the holder rotates
and an additional shaft gets added on top to create a longer shaft.
Here you can kind of see the shaft going into the ground beneath the truck.
Below is a video showing the drilling.

Things started to get a little steamy...

Drilling is done; Time to put in the well casing!
Lengths of casing were welded together to get the needed depth.
Before we left the brothers let us know that it was 54' to bedrock, and they drilled a total of 120'. They estimated a 20 gallon/minute flow rate, which is fantastic! My dad called later to let me know that they actually wrapped up not long after our departure. So after $3835 and less than two and a half hours, we have a well! We'll find out more of its details in a couple days when Moravec sends us a folder of information and some quotes on pump installation. They were really friendly and efficient, and we were very happy with their work. So pleased, in fact, that it kind of broke my heart to have to tell them we already have someone lined up to do geothermal work for us (they do some geothermal work, too). But overall, a very exciting morning!

Updated budget:
Cost of well drilling: $3,835.00
Total spent thus far: $31,538.29

Friday, January 4, 2013

This just got real.

This morning, Matt and I stopped by Roth Green Energy to firm up some details about the geothermal and solar PV systems they quoted us, as well as put in down payments to lock in our contracts. We were greeted by coffee and donuts (they got them just for us!) and enjoyed another really great meeting. In a previous post about estimates I promised to go into more detail about the quotes we received, which I can follow through with now that we've locked in their services.

Geothermal
Considering the planned size of our house, it was determined both by us as well as independently by the folks at Roth that a 2-ton system would suffice. Not only will the system supply heat for our house, but it will also supply domestic hot water (DHW). After some thought, we decided to go with the in-slab heating due to its efficiency, quietness, even heating, and the fact that we won't have to spend the time and money to construct a subfloor as originally planned with the baseboard heaters. Below is the scope of the project:
So, the bottom line: Total Geothermal $33,810.97
We put down a 30% down payment today of $10,143.29(!), which is the same amount we can expect to get back thanks to a 30% tax credit. So the total out of pocket is expected to be $23,667.68.

Solar
As far as solar panels are concerned, we figured: go big or go home. Since we are hoping to go net zero, we had to plan for a large PV array to cover all our energy consumption needs, which will be large since everything will be electric. We used a couple different approaches to project our total consumption, including estimating from my parents' electric bill (since we have similar habits, and their bill includes electric appliances and a well pump); estimating using our own current electric bill plus what we can expect from adding in electric appliances & a well pump; and using a worksheet provided by NYSERDA that included a breakdown by appliance. All three methods were surprisingly consistent with each other, and estimated a total usage of roughly 10,000 KWH/year. We also added in an additional 2,000 KWH/yr for an anticipated electric car (eventually). Roth Green Energy came back with the following 12,480(!) watt grid-tied PV system, complete with all materials, engineering/submittals, software, programming, installation and wiring, system commissioning, start-up, check out, and owner training:
  • Supply and install 48 Solar World 260W mono panels, roof mounted on front roof - brand new & 100% made in the USA!
    • 2 strings of 12 panels
  • Provide 2 Sunny Boy 6000US STD inverters
  • Production meter
  • Monitoring Package
  • Solar mount roof racking system
  • Provide wire, conduit string combiner, system disconnect, and miscellaneous electrical components to complete the installation
There are all kinds of incentives for solar, including grants, rebates, and a tax credit:
                 Project Cost                       $45,000.00
                 NYSERDA Grant                 ($10,500.00)
                 Initial Costs                        $34,500.00
                 Federal tax credit (30%)    ($10,350.00)
                 NY State rebate                ($5,000.00)
                 Total out of pocket           $19,150.00

We were shocked to see that, thanks to so many incentives, the total out of pocket cost of such a huge PV array is under $20,000. We still recognize that it is a huge investment that will take many years to recoup the costs, but seriously: HOW COOL IS THAT??!? Some people spend money on cars, some people spend money on traveling... I'm happy to invest in solar photovoltaics. Anyways, it was important to put in a down payment today so that they could get started on the paperwork, since it can take months to get it all approved (and boy are we glad they're doing all the paper pushing for us!!). We put in a 35% down payment towards the total project cost, meaning $15,750,00.

Yikes, we wrote two huge checks today :-O ... That fact is still sinking in. These are just the first two of many that are sure to come (or go, I suppose is more accurate). It feels scary to part with so much so quickly, but we are really excited about what this money is going towards. We feel we'll be setting a really great example and are excited to be pioneers in really committing to green energy. We are very happy that we've chosen Roth Green Energy for our energy needs and feel confident they'll do a great job!


Updated budget:
Deposit for Geothermal: $10,143.29
Deposit for Solar: $15,750.00
Total spent so far: $27,703.29

Thursday, December 13, 2012

Perc Tests, Take 2

Nearly 10 days ago we had our first perc tests and DOH inspection of the site. Unfortunately at that time, the standard perc tests failed. We did determine a location further away from where the house is planned that appeared suitable, but more perc tests were going to have to take place, again with a DOH representative present. This time we would not need to do the deep hole investigation, though, since that was accepted previously.

Earlier today our surveyor came back with the DOH inspector to witness perc tests at the new septic site. These tests were modified so as to be 12" deep and 18" deep holes instead of the standard 24". And the good news is, the 18" holes passed within 45 minutes! So taking these results into account, we now have a vague idea of what the septic leach field will have to be.

The Monroe County Dept. of Health website includes a helpful downloadable Sewage Disposal Design Handbook, which I have perused in an attempt to understand what kind of system we require. It turns out that there are many more options than I realized, and while the information is rather straightforward to follow, this goes outside my range of knowledge. From what I've read, and using the results of the perc tests, I believe we will be installing a modified raised bed system. We will need about 6" of sand to make up for the lack of depth of acceptable ground soil, but luckily this is on the rather low end of things as far as raised beds go. We will know more once the full official site plan is drawn up, which will take about 6 more weeks. Once the surveyor has completed his design, we can take it to a septic installer to get construction under way, during/after which we'll need more inspections. In the short term, now that we know where the septic system will go, we can get a well installed!


Updated budget:
Another Fee to Monroe County Dept. of Health: $125
Surveyor Fee: estimated to be ~ $5,000 total (standard); $1,500 down payment made.
Total spent thus far: $1,810

Tuesday, December 4, 2012

The Percs of House Building

Last week some official initial site planning took place. A surveyor and my dad dug some deep holes for perc tests. I guess the process is to dig holes, pour in water, and time out how long it takes to drain. According to Wikipedia:
The goal of percolation testing is to ensure the soil is permeable enough for septic tank effluent to percolate away from the drain field, but fine grained enough to filter out pathogenic bacteria and viruses before they travel far enough to reach a water well or surface water supply. Coarse soils – sand and gravel – can transmit wastewater away from the drain field before pathogens are destroyed. Silt and clay effectively filter out pathogens but allow very limited wastewater flow rates. Percolation tests measure the rate at which clean water disperses through a disposal trench into the soil.
Apparently the results weren't ideal, but either way we were going to need to dig some deep trenches and have a Monroe County official come out and inspect the dirt, which was scheduled for today.

Prior to today, a few stars aligned. A neighbor who runs a deer farm visited my parents a couple weeks ago because a bunch of the deer got loose, and they were wondering whether my parents had seen any. My dad agreed to keep an eye out... and meanwhile, it turns out this neighbor has a backhoe/bulldozer, and is willing to help out with digging. Fantastic coincidence!

Today, the surveyor, the inspector, the neighbor, my dad, and Matt and I all met in the field to dig trenches and analyze the dirt profile. Water was poured into the perc holes again for the inspector to observe and time.
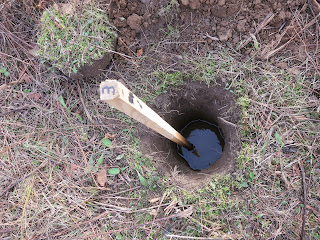
Perc test site 3 of 3
 And then our friendly neighbor started digging!
After digging about 4 feet, the inspector hopped in.
He picked away at the walls, crumbled the dirt in his hands, and measured how deep any mineral deposits were. Apparently minerals started appearing at about 19", which indicated the presence of water. The septic leach field needs to be a certain amount above the water table (I think 2'), so we would not be able to do a conventional below-surface design. Instead, we would have to do a modified raised system, which would be more expensive. Basically we would need sand, gravel, and topsoil to make up the depth difference - assuming the perc tests would pass within 45 minutes. However, it didn't look like that was going to happen. After digging down two more feet to make sure the analysis of this ditch was exhausted, the hole was backfilled and we scoped out another spot which might be more suitable.
Soil profile in the first ditch. The orange stripe is the mineral deposits.
The soil was rather sandy, with enough clay to be able to mold a ball.
As opposed to the initial dig, which was slightly downhill and west of the proposed house site, the surveyor suggested trying to dig east of the house where the land also sloped away, albeit more gently. And so, ditch #2 was dug.


This time, mineral deposits showed up at only 8" - even worse. We gave this ditch its due diligence and still dug down the full 6 feet before backfilling, but it was clear this site was not going to work. And after checking the perc tests, it became clear that in order to use the initial site, we would need an even deeper raised bed system - which would be even more expensive.

After the initial surprise and panic subsided, brainstorming ensued. So long as we were 100' away from any neighbors or streams (no problem), we could have the leach bed farther from the planned house site. We went back to the west side, further down the hill, and dug a third hole.

This dirt was rockier, but - success! The mineral deposits were 24" down this time. While we will likely still need to do a modified raised bed system (considering the slow perc tests), to install it further down the hill would mean trucking in less sand and topsoil. So it's looking like this will be the site.

Unfortunately, we would need new holes dug for perc tests to determine the necessary depth/height of the system, which would take more time than the surveyor had for today. We will have to wait until next week to get new perc tests done, and then have the inspector come out again and basically repeat the whole process we went through today - but hopefully next time we'll actually end up with an approved site.

Once we know where the septic is going to go, we can get a well drilled and house plans drawn up while the surveyor develops the detailed site plan. Although today did not totally go as planned, we have the time to be flexible and still keep on our rough timeline. Besides, it was fun getting out to the site and digging some holes - this is getting real! The not-so-fun real part was that today we incurred our first costs.

Gratuity to neighbor for use of his backhoe/bulldozer (initially he politely refused, but we wanted him to walk away with something): $60
Fee to Monroe County Dept. of Health: $125
Surveyor Fee: TBD with contract
Total spent thus far: $185