Now that we know where the septic system will go, we can get a well installed. As it turns out, the company that drilled my parents' well has sold out to another business. This other company only uses percussion drilling, whereas we were planning to employ a rotary driller*; and, even worse, they also offer dowsing services, which was a red flag for us. Dowsing, as far as we're concerned, is a bunch of baloney - the stuff of Looney Tunes and Smurfs cartoons (I definitely remember Wyle E. Coyote using a divining rod). So, it was time to find another driller.
My dad pretty much took the lead on this, and through some searching found Moravec Water Wells. They sounded much more promising, especially since instead of also offering dowsing services they offer geothermal systems. Although we don't need a geothermal contractor (since we are already going with Roth Green Energy), at least this shows Moravec's priorities line up better with our own. Not only that, but within a few hours of my dad first calling, they were already out to visit the site!
My dad was pleased with the meeting, so it looks like we've got a well contractor. Now we just have to wait a bit for the ground to firm up so that they can get their 34-ton (!) trucks in to start drilling. We have to hope the ground will soon freeze up, without getting too much snow (since the snow will keep the ground pretty insulated and can actually keep things muddy). Hopefully we can get drilling soon, though realistically it's not urgent.
*A note on percussion vs. rotary drilling: Percussion drilling is an old technique that basically repeatedly drops a ram to pulverize the ground and create a hole. After clearing out the sludge, the well casing is pushed and pounded into place. Percussion drilling is cheap, but results in a less efficient well due to compaction and smearing along the sides of the borehole. Also, one of the neighbors got a new well drilled using this method not too long ago, and it noisily pounded along for days. Rotary drilling is just as it sounds: a rotating bit that excavates a borehole. The process is more expensive, but it's faster and allows for analysis and engineering of the well design. Reference
Research, Conception, Design, Construction, and Outcomes of our (future) green home in Upstate NY.
Tuesday, December 18, 2012
Thursday, December 13, 2012
Perc Tests, Take 2
Nearly 10 days ago we had our first perc tests and DOH inspection of the site. Unfortunately at that time, the standard perc tests failed. We did determine a location further away from where the house is planned that appeared suitable, but more perc tests were going to have to take place, again with a DOH representative present. This time we would not need to do the deep hole investigation, though, since that was accepted previously.
Earlier today our surveyor came back with the DOH inspector to witness perc tests at the new septic site. These tests were modified so as to be 12" deep and 18" deep holes instead of the standard 24". And the good news is, the 18" holes passed within 45 minutes! So taking these results into account, we now have a vague idea of what the septic leach field will have to be.
The Monroe County Dept. of Health website includes a helpful downloadable Sewage Disposal Design Handbook, which I have perused in an attempt to understand what kind of system we require. It turns out that there are many more options than I realized, and while the information is rather straightforward to follow, this goes outside my range of knowledge. From what I've read, and using the results of the perc tests, I believe we will be installing a modified raised bed system. We will need about 6" of sand to make up for the lack of depth of acceptable ground soil, but luckily this is on the rather low end of things as far as raised beds go. We will know more once the full official site plan is drawn up, which will take about 6 more weeks. Once the surveyor has completed his design, we can take it to a septic installer to get construction under way, during/after which we'll need more inspections. In the short term, now that we know where the septic system will go, we can get a well installed!
Updated budget:
Another Fee to Monroe County Dept. of Health: $125
Surveyor Fee: estimated to be ~ $5,000 total (standard); $1,500 down payment made.
Total spent thus far: $1,810
Monday, December 10, 2012
Our first estimates!
Up until now we have spoken with a number of companies regarding green energy solutions, but have not had a lot come of it. Some companies don't really seem that knowledgeable; some seem to have more of a "me too" kind of approach. Or, some companies don't seem very enthusiastic about working with us, and aren't necessarily receptive to design questions. One such company was one we had a great, informative, and exciting conversation with at Greentopia, but now when it comes time to move forward things don't feel so friendly anymore. What gives? Don't people want our business? Don't they think we are serious?
Well, I guess that just goes to show that those are not the right companies for us. At any rate, ten days ago we met with Roth Green Energy, a division of Leo J. Roth corporation. We actually got connected to them through my searches for a metal roof installer, during which I found Leo J. Roth Corp. These guys seemed like everything we're looking for - the gentleman I spoke to was very knowledgeable, answered all my questions, and gave me a lot of great information about the types of metal roofs I should consider for solar panels - except, unfortunately, it turns out they are a commercial installer and their insurance does not cover residential. Rats. Even so, the helpful gentleman told me about their Green Energy division, which led to our meeting 10 days ago. At this meeting we learned all about the services Roth Green Energy offers, including geothermal and solar. Much of our researched knowledge was confirmed and our questions answered. Even better, their engineer is part of the installation process, which makes us more confident in the quality of their work. And best of all, we chatted at-length about our overall house plans, which they thought were very clever, logical, and well-informed. It felt nice to finally have some of our ideas reinforced, rather than being looked at like we're crazy. They even took us on a tour of their facilities, even though it was a Saturday. (For future reference, they also have a crane for hire. That could come in handy later.) The meeting overall was incredibly encouraging and invigorating - now this is more like it!
Based on our discussions in that meeting, we asked for estimates for a geothermal radiant baseboard system, a geothermal radiant slab system, and as large and powerful a solar array could be achieved on the dimensions of our south-facing roof, aiming for ~10kw. Earlier this evening we met up at the site to go over the topography, after which we went to my parents' house to discuss the project estimates. Since we haven't signed anything official or made any deposits yet, I won't go into detail about the quotes, but I will say that we were very happy with them. Matt and I were both expecting the out-of-pocket expense for the solar to be three times as much as estimated, so that came as a very pleasant surprise. The geothermal quotes were pretty much as expected, though the part that surprised us was that the in-slab radiant actually came out slightly cheaper in comparison to baseboard. We had expected the in-slab to be more expensive, so now we have more to consider when it comes to deciding which radiant approach to take.
We are now quite certain that we will be getting geothermal and solar, both installed by Roth Green Energy. Next up, we need to decide whether we want to go with radiant slab or baseboard heat, after which we can agree on the contracts, put down deposits, and finalize drawings and parts lists for final review. At that point I'll go into more detail about the systems we're going with and the reasoning behind them.
So, readers: Does anyone have radiant in-floor heating? The fact that it is so permanent and inaccessible makes me kind of nervous. How likely is a slab on-grade to ever crack; and if it does, what possible ramifications would there be on the in-floor radiant system and on the house structure as a whole? Also, how do we deal with doorways or floor transitions (i.e., wood to carpet, etc.) where something would need to be nailed down? I must admit that I am leaning towards the radiant slab, but it complicates things to a point where we will have to rely on others to do the job (whereas before we were planning to do much of the concrete work ourselves).
Tuesday, December 4, 2012
The Percs of House Building
Last week some official initial site planning took place. A surveyor and my dad dug some deep holes for perc tests. I guess the process is to dig holes, pour in water, and time out how long it takes to drain. According to Wikipedia:
Prior to today, a few stars aligned. A neighbor who runs a deer farm visited my parents a couple weeks ago because a bunch of the deer got loose, and they were wondering whether my parents had seen any. My dad agreed to keep an eye out... and meanwhile, it turns out this neighbor has a backhoe/bulldozer, and is willing to help out with digging. Fantastic coincidence!
Today, the surveyor, the inspector, the neighbor, my dad, and Matt and I all met in the field to dig trenches and analyze the dirt profile. Water was poured into the perc holes again for the inspector to observe and time.
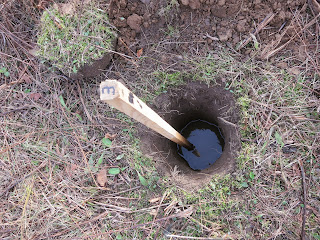
And then our friendly neighbor started digging!
After digging about 4 feet, the inspector hopped in.
He picked away at the walls, crumbled the dirt in his hands, and measured how deep any mineral deposits were. Apparently minerals started appearing at about 19", which indicated the presence of water. The septic leach field needs to be a certain amount above the water table (I think 2'), so we would not be able to do a conventional below-surface design. Instead, we would have to do a modified raised system, which would be more expensive. Basically we would need sand, gravel, and topsoil to make up the depth difference - assuming the perc tests would pass within 45 minutes. However, it didn't look like that was going to happen. After digging down two more feet to make sure the analysis of this ditch was exhausted, the hole was backfilled and we scoped out another spot which might be more suitable.
As opposed to the initial dig, which was slightly downhill and west of the proposed house site, the surveyor suggested trying to dig east of the house where the land also sloped away, albeit more gently. And so, ditch #2 was dug.
This time, mineral deposits showed up at only 8" - even worse. We gave this ditch its due diligence and still dug down the full 6 feet before backfilling, but it was clear this site was not going to work. And after checking the perc tests, it became clear that in order to use the initial site, we would need an even deeper raised bed system - which would be even more expensive.
After the initial surprise and panic subsided, brainstorming ensued. So long as we were 100' away from any neighbors or streams (no problem), we could have the leach bed farther from the planned house site. We went back to the west side, further down the hill, and dug a third hole.
This dirt was rockier, but - success! The mineral deposits were 24" down this time. While we will likely still need to do a modified raised bed system (considering the slow perc tests), to install it further down the hill would mean trucking in less sand and topsoil. So it's looking like this will be the site.
Unfortunately, we would need new holes dug for perc tests to determine the necessary depth/height of the system, which would take more time than the surveyor had for today. We will have to wait until next week to get new perc tests done, and then have the inspector come out again and basically repeat the whole process we went through today - but hopefully next time we'll actually end up with an approved site.
Once we know where the septic is going to go, we can get a well drilled and house plans drawn up while the surveyor develops the detailed site plan. Although today did not totally go as planned, we have the time to be flexible and still keep on our rough timeline. Besides, it was fun getting out to the site and digging some holes - this is getting real! The not-so-fun real part was that today we incurred our first costs.
Gratuity to neighbor for use of his backhoe/bulldozer (initially he politely refused, but we wanted him to walk away with something): $60
Fee to Monroe County Dept. of Health: $125
Surveyor Fee: TBD with contract
Total spent thus far: $185
The goal of percolation testing is to ensure the soil is permeable enough for septic tank effluent to percolate away from the drain field, but fine grained enough to filter out pathogenic bacteria and viruses before they travel far enough to reach a water well or surface water supply. Coarse soils – sand and gravel – can transmit wastewater away from the drain field before pathogens are destroyed. Silt and clay effectively filter out pathogens but allow very limited wastewater flow rates. Percolation tests measure the rate at which clean water disperses through a disposal trench into the soil.Apparently the results weren't ideal, but either way we were going to need to dig some deep trenches and have a Monroe County official come out and inspect the dirt, which was scheduled for today.
Prior to today, a few stars aligned. A neighbor who runs a deer farm visited my parents a couple weeks ago because a bunch of the deer got loose, and they were wondering whether my parents had seen any. My dad agreed to keep an eye out... and meanwhile, it turns out this neighbor has a backhoe/bulldozer, and is willing to help out with digging. Fantastic coincidence!
Today, the surveyor, the inspector, the neighbor, my dad, and Matt and I all met in the field to dig trenches and analyze the dirt profile. Water was poured into the perc holes again for the inspector to observe and time.
| Perc test site 3 of 3 |
After digging about 4 feet, the inspector hopped in.
He picked away at the walls, crumbled the dirt in his hands, and measured how deep any mineral deposits were. Apparently minerals started appearing at about 19", which indicated the presence of water. The septic leach field needs to be a certain amount above the water table (I think 2'), so we would not be able to do a conventional below-surface design. Instead, we would have to do a modified raised system, which would be more expensive. Basically we would need sand, gravel, and topsoil to make up the depth difference - assuming the perc tests would pass within 45 minutes. However, it didn't look like that was going to happen. After digging down two more feet to make sure the analysis of this ditch was exhausted, the hole was backfilled and we scoped out another spot which might be more suitable.
| Soil profile in the first ditch. The orange stripe is the mineral deposits. The soil was rather sandy, with enough clay to be able to mold a ball. |
This time, mineral deposits showed up at only 8" - even worse. We gave this ditch its due diligence and still dug down the full 6 feet before backfilling, but it was clear this site was not going to work. And after checking the perc tests, it became clear that in order to use the initial site, we would need an even deeper raised bed system - which would be even more expensive.
After the initial surprise and panic subsided, brainstorming ensued. So long as we were 100' away from any neighbors or streams (no problem), we could have the leach bed farther from the planned house site. We went back to the west side, further down the hill, and dug a third hole.
This dirt was rockier, but - success! The mineral deposits were 24" down this time. While we will likely still need to do a modified raised bed system (considering the slow perc tests), to install it further down the hill would mean trucking in less sand and topsoil. So it's looking like this will be the site.
Unfortunately, we would need new holes dug for perc tests to determine the necessary depth/height of the system, which would take more time than the surveyor had for today. We will have to wait until next week to get new perc tests done, and then have the inspector come out again and basically repeat the whole process we went through today - but hopefully next time we'll actually end up with an approved site.
Once we know where the septic is going to go, we can get a well drilled and house plans drawn up while the surveyor develops the detailed site plan. Although today did not totally go as planned, we have the time to be flexible and still keep on our rough timeline. Besides, it was fun getting out to the site and digging some holes - this is getting real! The not-so-fun real part was that today we incurred our first costs.
Gratuity to neighbor for use of his backhoe/bulldozer (initially he politely refused, but we wanted him to walk away with something): $60
Fee to Monroe County Dept. of Health: $125
Surveyor Fee: TBD with contract
Total spent thus far: $185
Tuesday, November 13, 2012
How do we heat?
I have been looking into this a lot and so has our first choice for a GC, Al. It seems we are set on a Geothermal heat-pump system that would provide heat to some sort of radiant heating system.
At this point in the selection of the best radiant system I have seen a lot of talk that the best way to use a geothermal heat-pump water system would be to use in floor radiant (http://www.advancedsolutions.ca/geothermal.html).
The issues with this system at our current level of planning is that we have a one floor, no basement, concrete slab directly under the floor. So one might say that it is an obvious choice to put radiant into the slab because it's the easiest way to go....but I don't buy that it is more efficient in this situation because I wonder just how much of that heat is going to be dumped *under* the house and just disappear forever. So another solution to the in-floor problem is an idea that I just had, so it's a little rough. We put down a "sub-floor" of 1"or 2" high-density polystyrene foam and then lay the in-floor radiant on top of that. Maybe the foam could even be foil backed to reflect the most amount of radiant heat back into the home.
Another solution to the heating problem is to use baseboard heating.
Again looking at the literature I have only seen comments against this because baseboards work best with 180 F water, and most geothermal systems will output 140 F water. But what if the geothermal is just a pre-heater, then another water heater could be used to bump the temperature up to the required baseboard heat. This has the hitch of needing two systems to get the water up to temp if my thinking is correct. Additionally would we be able to use that water heater as a dual purpose; for the residential water and the heating. Maybe we just need a geothermal system with a heating loop and a residential loop in the heat exchanger?
Yes, a lot of this is rambling, trying to at least get ideas onto 'paper' as it were. But I wouldn't mind some outside input either, to know if anyone has even heard of doing this and the possible logistical difficulties with any of these plans. A lot of people push you towards forced air because you get 'free' cooling, but we plan on essentially passive cooling by designing our roof to block the sun in summer and planting the appropriate trees to increase that level of blocking.
So again, still mostly in the planning phase for this but trying to come up with a realistic solution is quite varied and they all have pros and cons.
Sunday, October 21, 2012
Preliminary Site Planning
My dad (whom I introduced you to in one of my first posts), being retired and all, is fortunate to have a lot of time to think about Futurehome. Because of this he has taken on somewhat of a project manager role. To that end, he stopped by the town hall a while ago to pick up some information on forms and permits that we will eventually have to complete, to help us get a sense of what to expect. From this it became clear that one of our first tasks will be to hire a surveyor to come out, analyze the land, and develop a site plan. Well, we figured we could help this along by doing a little site planning of our own, using what we know about general well and leach field requirements and our initial house design. Then, it should hopefully be a quick and painless process to have the surveyor come out.
Conveniently enough, there is a USGS benchmark on the property:
Unfortunately, it is a little mangled. Nonetheless, we used this as a control point with our little handheld GPS. First we measured the two nearest utility poles relative to the BM, as well as the distance to the current driveway.
We were originally estimating that Futurehome should be about 300' north of the BM, so we trudged into the field due north. However, this actually put us into a totally different part of the land than we were expecting, and we were a ways down the hill that we were planning to be on the crest of. It turns out that none of our visual cues from the ground were straight or lined up latitudinal or longitudinally - the road, the tree edge, the hill, nothing. So it was a good thing we were using a GPS for a guide. It was surprising to realize how disorienting the whole area was. Using a compass we headed due east to the crest of the hill for what turned out to be ~150', and marked that point on our GPS and in the ground with a stake as the south west corner of Futurehome.
From there we used a tape measure to go 32' north and mark the NW corner; then 64' east to mark the NE corner; and then 32' south again to mark the SE corner. From the NE corner we paced about 30' east and 20' north for an approximate well location. Now with an idea of where the house will most likely go, we had a chance to look around and get a feel for it all. We took a bunch of pictures all around us and used Photosynth to generate a 360º panorama of the current view. A keen eye will be able to spot my dad hidden in among the gone-to-seed goldenrod, and an even keener eye will be able to spot the car we used to drive in. Obviously the vegetation is quite tall, so we will probably go in with a tractor mower soon to clear away at least the house footprint.
The existing driveway ended up being mostly straight ahead but with a couple trees in the way, which blocks the view of the house from the road (all good things, in our opinion). The house is practically smack-dab in the middle of the field, with the woods and valley not too far behind. And as you can see from the Photsynth, there is not a neighbor in sight.
Using a level set to a measured angle, we were able to estimate where the sun will cross the sky in the winter and summer months, and confirmed that the house is far enough away from the tree line to get full southward facing sun year-round. All things seemed to be coming together quite nicely, so we decided we were very happy with the site we staked out.
Using our waypoints and measurements, we drew up a nice little preliminary site plan:
Hopefully we will be able to use all of this to smoothly get an official site plan drawn up, and then we can really get the ball rolling on things like making a driveway, drilling a well, etc. Either way, this was a very exciting visit to the site of Futurehome.
Conveniently enough, there is a USGS benchmark on the property:
| Whoever does the mowing along the road apparently is unaware of the fine or imprisonment associated with disturbing benchmarks. |
We were originally estimating that Futurehome should be about 300' north of the BM, so we trudged into the field due north. However, this actually put us into a totally different part of the land than we were expecting, and we were a ways down the hill that we were planning to be on the crest of. It turns out that none of our visual cues from the ground were straight or lined up latitudinal or longitudinally - the road, the tree edge, the hill, nothing. So it was a good thing we were using a GPS for a guide. It was surprising to realize how disorienting the whole area was. Using a compass we headed due east to the crest of the hill for what turned out to be ~150', and marked that point on our GPS and in the ground with a stake as the south west corner of Futurehome.
From there we used a tape measure to go 32' north and mark the NW corner; then 64' east to mark the NE corner; and then 32' south again to mark the SE corner. From the NE corner we paced about 30' east and 20' north for an approximate well location. Now with an idea of where the house will most likely go, we had a chance to look around and get a feel for it all. We took a bunch of pictures all around us and used Photosynth to generate a 360º panorama of the current view. A keen eye will be able to spot my dad hidden in among the gone-to-seed goldenrod, and an even keener eye will be able to spot the car we used to drive in. Obviously the vegetation is quite tall, so we will probably go in with a tractor mower soon to clear away at least the house footprint.
The existing driveway ended up being mostly straight ahead but with a couple trees in the way, which blocks the view of the house from the road (all good things, in our opinion). The house is practically smack-dab in the middle of the field, with the woods and valley not too far behind. And as you can see from the Photsynth, there is not a neighbor in sight.
| The current "driveway"...kinda |
| The view exiting our property at the planned driveway location. I really hope construction equipment can fit through here without having to take out trees, because this is a beautiful sight. |
| (I'm keeping all exact locations private for now, hence the smudges.) |
Hopefully we will be able to use all of this to smoothly get an official site plan drawn up, and then we can really get the ball rolling on things like making a driveway, drilling a well, etc. Either way, this was a very exciting visit to the site of Futurehome.
Saturday, October 20, 2012
Some initial design ideas
In a previous post I outlined some of the general plans we are considering with regards to house design. As previously stated, we are looking at a simple rectangular shape. This is advantageous both from a materials standpoint as well as a construction standpoint, as waste should be minimized and construction ease maximized. From a usage standpoint, this approach eliminates any blocked views, and any given window will have a minimum 180º field of view.
Following this shape, the best living spaces would be at the 4 corners, where you can get two perpendicular walls' worth of windows (and therefore ample sunlight, cross breezes, etc.). The middle of the house can then be used for the kinds of spaces that are more utilitarian and/or less dependent on windows and scenery: garage, utility room, kitchen, bathrooms. (We are not "kitchen entertainers" and do not care to make the kitchen part of our living space; though we probably will have space for an eat-in kitchen.)
From these concepts we have been sketching out some rudimentary house plans, just to get some kind of an idea of how this might all come together:
In this example, each square on the grid is 2 feet, and north is straight-up. Here we are considering overall dimensions of 32'x64', giving a total square footage of 2,048.
- Estimating a garage of about 20' wide by 17' deep, this gives a total living area of 1,708 sq ft.
- Across from the garage, in the middle of the house, are the kitchen and the utility room. These are placed strategically based both on the reasoning above as well as ease with which to get groceries to the kitchen and 50-lb bags of salt buttons to the utility room. Also, the dryer (in the utility room) and the range hood can be on opposite sides of one wall and can share the same exhaust.
- With this placement, the rest of the house is essentially divided up into east and west "wings": east wing for bedrooms (capitalizing on morning sunlight), and the west wing for living spaces.
- The main hallway is currently planned to be 42" wide. While that seems like wasted space at first, we learned the hard way that skimping on hallway width can make life surprisingly difficult, especially if you find yourself maneuvering something like a wheelchair.
- We plan to have pocket doors or sliding barn doors at either end of the main hallway that can allow for each "wing" to be closed off. This is helpful for purposes of entertaining, heating, or even containing smelly food preparation.
- There is a full bathroom near the bedrooms, and a half bathroom near the main living area. This placement follows our living patterns but also makes plumbing very convenient, as all sinks, tubs, toilets, etc. are concentrated in the center of the house. The shower and all sinks are also therefore in close proximity to the water tank, so hot water will come on practically instantaneously.
As you can see, we haven't nailed down any ideas of how to break apart the living spaces into rooms. We have sketched and erased some ideas for walls, but this was mostly to be sure that if we were to break up the east "wing" into 3 bedrooms that the total area would be large enough. Overall we are not sure how we will want it to work out. Part of the beauty of only having one level and truss construction for the roof is that we don't have any interior load-bearing walls. So, we might choose to start living in the house without breaking up the "wings" at all initially, and then see how the spaces work for us and go from there.
I am not a big fan of "open" floorplans, but I can definitely get behind a "flexible" floorplan - especially because I find it very hard to predict how I will want a space to be until I have had a chance to be in it for a while. Also I like to be able to rearrange furniture, so it would be nice to have rooms that allow for multiple configurations. We can also feel free to adapt the rooms according to our place in life: have a kid, wall off a bedroom; empty nesters, take down walls and reclaim unused space. Since we plan on being in the house for the remainder of our years, this is a pretty attractive approach.
Which isn't to say we couldn't use a little suggestion and inspiration from an architect. Plus there are additional considerations like where to position outlets and light switches. We definitely need to get on the ball finding an architect so that we can benefit from some professional experience, advice, and knowledge of building codes.
Subscribe to:
Posts (Atom)