This might be the most disappointing blog entry yet, since I named it "big reveal" but I reveal nothing by way of pictures. Sorry, we lapsed on photo documenting duties this weekend! Nonetheless, that doesn't make our work any less noteworthy.
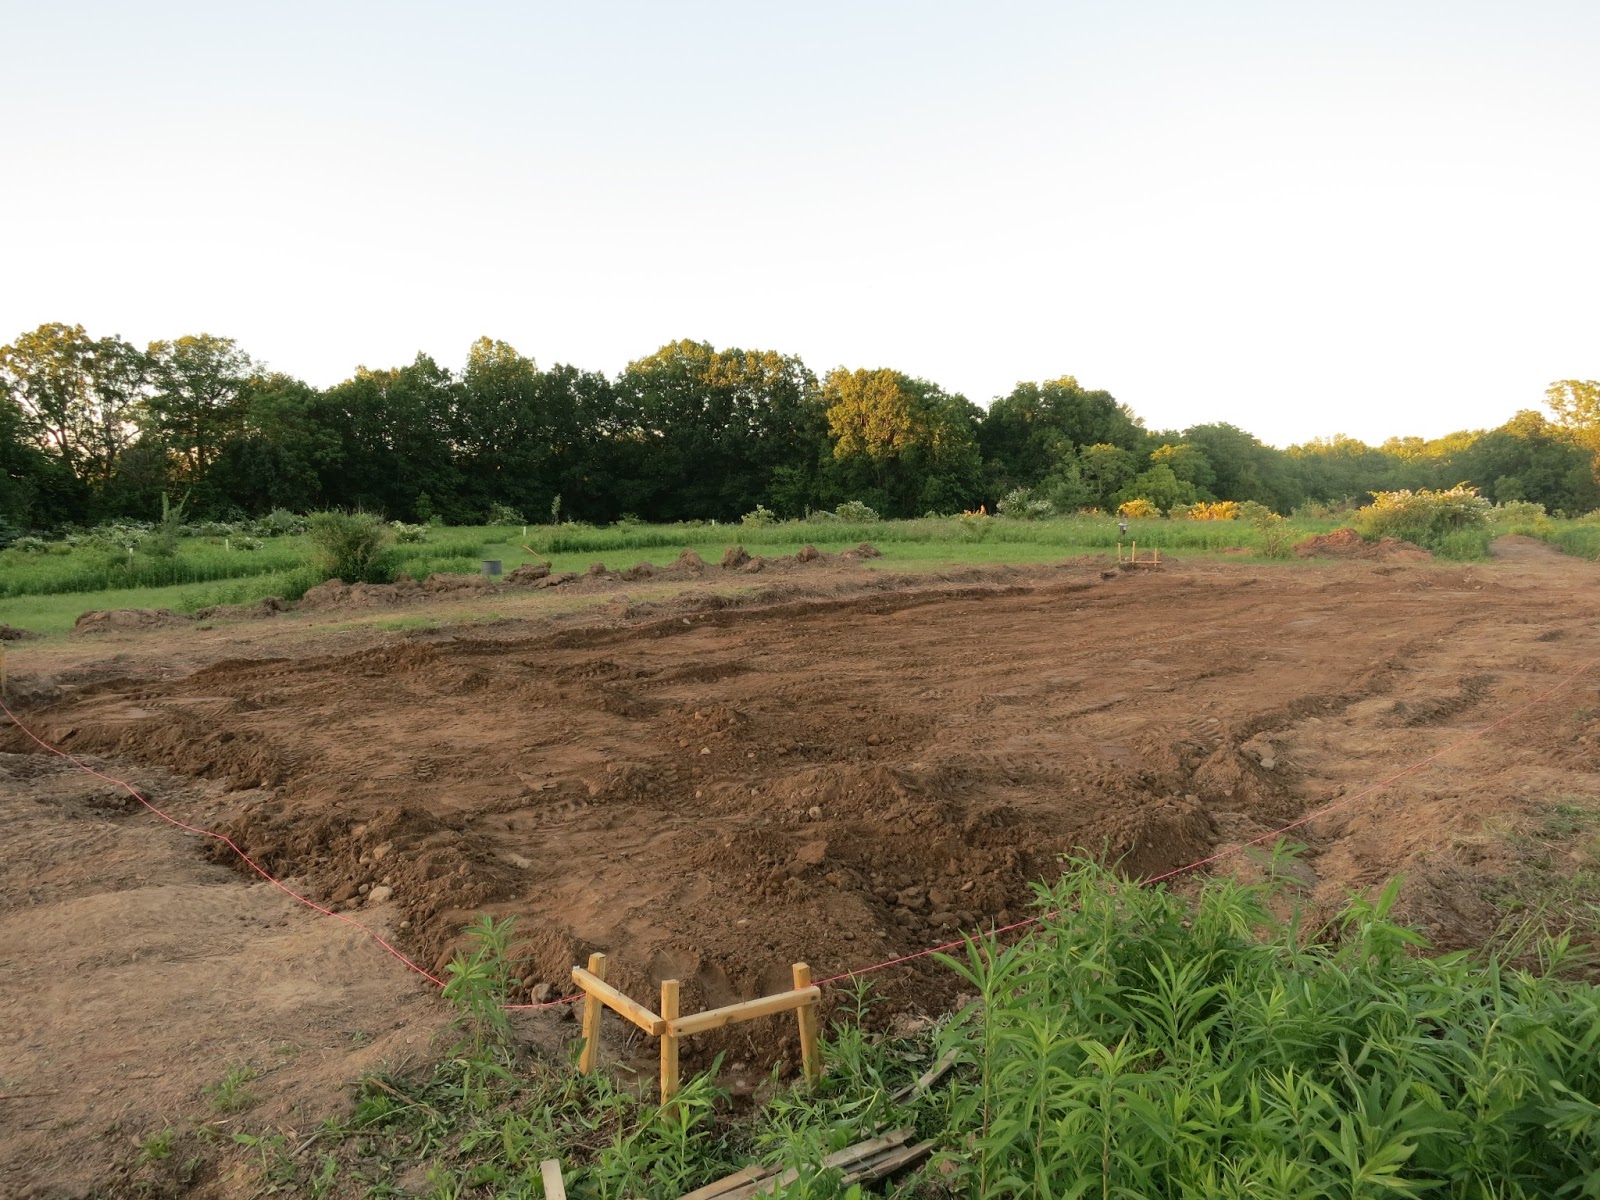
Matt and I both had Friday off of work (our 5 year wedding anniversary :-) ) and we used the morning as an opportunity to do a little work on the site. Unfortunately there was rain on and off, but we managed to make some progress since we knew we were going to be away for most of the weekend, and gravel comes tomorrow (Monday). The "big reveal" I alluded to was removing the inside of the forms to see the set concrete footers, woo hoo! This was exciting for us to see, particularly because it is our first above-ground structure (soon to not be above ground anymore, but whatever); however, it really couldn't be much more underwhelming in pictures, so we didn't bother to take any. With some help from our friends Mark and Josh, we hammered some very archaic-looking cut nails from the outside wooden forms into the footers to help keep them there, since they will purposefully remain as part of a thermal break (along with more foam to be added later). After another rainstorm passed, we then did a little backfilling so that the gravel truck could pull up as closely as possible to the middle of the work area; and then we cleaned up the scattered tools, containers, and trash from around the site. From there Matt and I took off for our anniversary weekend.
This morning we decided we wanted to get back so we could do more prep before the gravel gets delivered, so we drove back to the site and placed two geothermal pipes that were given to us by Roth Green Energy. Previously we put conduit into the footer trenches so that we would have a place to feed this pipe through once the footers were poured. We placed these pipes through the conduit, packed in any empty space with foam, and then called it a day because it turned out to be incredibly hot and we were tired. We meant to also dig a trench to lay the sewer pipe, but decided we could do it later.
Okay so this wasn't a very exciting update, but things are sure to get exciting again soon, because gravel (for under the slab) arrives tomorrow! Here's hoping we have good weather, though the forecast is a little iffy. It seems to be anytime we schedule a gravel delivery, it rains.
Updated budget:
+ $13.96 for cut nails
TOTAL SPENT SO FAR: $46,652.76
Sunday, June 30, 2013
Wednesday, June 26, 2013
2 Chutes, 5 Slump and you will be a Pro
So over the weekend, after we got the forms done on Friday 6/21, we marked out doors, placement of J-bolts, and laid out conduit for our septic, water and geothermal. The doors were marked out so that when the footers get poured, we could take care to smooth out where our wooden threshold/thermal break would go.
Luckily we only had to install a 2ft section of the septic line to give us enough bite on both sides to attach to the interior plumbing and septic tank outside. For the geothermal we used a couple of 2in PVC pieces down about 36in in the trench. For the water inlet we put a 3in piece of PVC at an angle so that it would be just inside the wall at the floor, and close to the bottom of the footer.
We cleaned up the site and moved dirt around so the concrete trucks would be able to drive clear around the forms. We also installed some scrap pieces of wood, carpet and plastic to cover any holes on the inside of the form and prevent concrete from spilling out. The earliest we could schedule concrete for a morning pour was Wednesday (today), so that's what we planned on.
This morning the first truck arrived right on time, at 9:00am. The guy first asked "Has anyone run a chute before?" We all looked around at each other and made a rather awkward gesture to Al, who last poured concrete at least 20 years ago. Well then everyone pointed at Matt to be the guy to do it. So the driver was nice enough to give us some pointers.
 |
| Matt and Bob (Matt's dad) getting a lesson on how to run a chute! |
He asked what mix we would like ("You ordered a 4 slump but 5 will flow a little better"). Asked how many chutes we wanted, "Two I think...". He showed Matt and Bob the proper hand signals for starting, stopping, up, down and forward. And then we got to pouring.....
You'll
notice in these videos that when it comes to construction attire, Matt
goes for full coverage based on scary stories that he heard... Bob (Matt's Dad) goes for mostly covered because he didn't know one way or the other... Al (Bethy's Dad) goes
for no coverage because he has had only good experiences with concrete. TEHO.
The plan was for each truck to slowly drive all around the perimeter while pouring to make one layer, which will set slightly in time for the next truck to arrive and do the same. Matt took charge on the chute, while Al helped spread things in the trench, and Bob helped shovel off the chute. Bethy filmed and filled in as needed.
The first truck was done in just under an hour, after which he cleaned up off to the side and the other truck showed up shortly after he left. His parting words were, "Tell him you want 2 chutes and about a 5 slump and he will think you're a pro". Thanks, first driver, for all the helpful hints and tips!!
The second driver...we'll just say he is used to more of a dump job, but we were able to accommodate, building on all our experience mere moments before. He got around in about 35min, and just as he got done cleaning up the 3rd truck showed up. This was the slightly more critical pour because we wanted to fill up just to the top of the form, no more, no less. We also had to start placing the J-bolts as the concrete began to set, but of course Al wasn't going to just throw them in; he had quite the plan, which involved using his homemade fixture to place them at the proper depth, centering and angle.
 |
| Al and his precision J-bolt placement mechanism |
 |
| Using the precision J-bolt placement mechanism to ensure proper placement (against the back), depth (line up the top of the bolt with the top of the mechanism), and angle (make it straight against the mechanism). |
Bethy was our master screeder (yeah I kinda made that word up) and had made it almost all the way around, when the mason we were hiring to pour the slab showed up to check out the site, and even lent a hand screeding off the last little edge of the footer. He was pretty happy with what he saw that day and sounded up for the job!
 |
| All poured |
 |
| That inside form is a little wonky, but that's okay. |
Updated budget:
+ $3389.04 for 3 trucks of 9 yds concrete each
TOTAL SPENT SO FAR: $45,330.51
Friday, June 21, 2013
Literally in the Trenches
Yesterday, Thursday June 20th, we finished the last little bit of
digging (~18ft on the west side) the trenches. It was just Matt and Al,
leveling the bottom of the trenches and beginning installation of the
concrete forms. The trenches are approximately 1ft wide x3ft deep, but the total
footer without slab is supposed to be 42in, hence an additional 2x6
above the trench.
Our design for the forms was to have a tall post in the trench every 4 feet that holds the outer 2x6 at the correct height. The 2x6 is then braced by a stake towards the inside of the house, to give the correct outside dimensions and level of the house. Off of the brace we then hang another 2x6 to form out the top of the footer.
The insulating foam board (that we wrapped like presents) is then installed behind the long posts, under the outside 2x6. Later on we will add an additional 1ft piece of foam outside the forms for a total of 3ft x 2in of foam below grade.
We used a string held taught at the 4 corners to gauge our height and width. The corner marks were based off of our first level sighting using the water level. Having done many second checks we found the strings to be right on the money.
We knew, despite the water in the bottom of the trench, that we were on firm ground because when we went to drive in the first few posts that hold up the forms they only went in about 2in. Given that the post only has to hold up the form we figured this was good enough. Once we put in the first full 16ft length we seemed to get in a rhythm and got about halfway around the house before the day was getting long.
Today (Friday, June 21st), feeling a little worse for wear on Matt's and Al's side of things, we got to work finishing what we had started the day before. This time Bethy was down too so we knew we could finish the whole thing. We all got hard to work and the work passed swiftly.
A little after 3, as the end was in sight we decided to call the building inspector to have him come down and take a look at our progress and give the go ahead to pour the footers. We finished up, did a little cleanup (including getting out more water) and waited for him to come around.
We got him down there and his first words were 'It's
too clean looking', always good to start off on the right foot. Again
he wasn't too concerned about the amount of water we had. He took a walk
around, asked a couple questions about the dimensions and then signed a
paper saying that we could proceed to the next step.
Unfortunately we were slightly unprepared for the
finished state of the forms because we had not yet called in for
concrete. Oops. We quickly learned that everyone was already booked for
the weekend and the next soonest would be Tuesday. (We also learned you
may as well book concrete and then cancel the morning of, rather than
ever wait again). So great progress but not so good foresight.
Updated budget:
+ $523.79 for 12, 2x4x8 Dow Scoreboard footer foam
+ $59.99 for a 100' roll of 12' wide black plastic (used to wrap the foam)
+ $27.82 for 2, 5lb boxes drywall screws
+ $124.00 for 50, 8' 2x2 stakes
+ $373.76 for 32, 16' 2x6 boards
TOTAL SPENT SO FAR (plus applicable taxes): $41,941.47
Our design for the forms was to have a tall post in the trench every 4 feet that holds the outer 2x6 at the correct height. The 2x6 is then braced by a stake towards the inside of the house, to give the correct outside dimensions and level of the house. Off of the brace we then hang another 2x6 to form out the top of the footer.
The insulating foam board (that we wrapped like presents) is then installed behind the long posts, under the outside 2x6. Later on we will add an additional 1ft piece of foam outside the forms for a total of 3ft x 2in of foam below grade.
We used a string held taught at the 4 corners to gauge our height and width. The corner marks were based off of our first level sighting using the water level. Having done many second checks we found the strings to be right on the money.
We knew, despite the water in the bottom of the trench, that we were on firm ground because when we went to drive in the first few posts that hold up the forms they only went in about 2in. Given that the post only has to hold up the form we figured this was good enough. Once we put in the first full 16ft length we seemed to get in a rhythm and got about halfway around the house before the day was getting long.
 |
| Northwest Corner, halfway there... |
 |
| Matt's satisfied with the progress |
 |
| Looks nice and straight too!!! |
Today (Friday, June 21st), feeling a little worse for wear on Matt's and Al's side of things, we got to work finishing what we had started the day before. This time Bethy was down too so we knew we could finish the whole thing. We all got hard to work and the work passed swiftly.
A little after 3, as the end was in sight we decided to call the building inspector to have him come down and take a look at our progress and give the go ahead to pour the footers. We finished up, did a little cleanup (including getting out more water) and waited for him to come around.
 |
| Bailing water out of the trenches. |
 |
| All done! |
Updated budget:
+ $523.79 for 12, 2x4x8 Dow Scoreboard footer foam
+ $59.99 for a 100' roll of 12' wide black plastic (used to wrap the foam)
+ $27.82 for 2, 5lb boxes drywall screws
+ $124.00 for 50, 8' 2x2 stakes
+ $373.76 for 32, 16' 2x6 boards
TOTAL SPENT SO FAR (plus applicable taxes): $41,941.47
Wednesday, June 19, 2013
Trenching, No it wasn't supposed to be a Moat
Thanks to the ridiculous amount of rain we've gotten right after we got our building permit,
we have been very slow to get started and have been put about two weeks
behind our desired schedule at this point. Thankfully we finally had
some decent enough weather over the past few days to make some progress.
On Sunday the 16th, the weather broke mid-way in the afternoon and we were able to hang some strings along our leveled plane. We used kite string for this purpose, as it was fine enough not to sag too much under its own weight but strong enough that it could be pulled tightly. We added 2 inches in each direction (so, overall dimensions of 36'x68') so that when we dig the footer trenches there is space for 2" insulating foam and 2" wooden forms around the perimeter of where the house will be sitting (as these materials are not structural and therefore should not bear any load). We then spray painted over the string to create outside lines to dig the trenches along.
After this, we prepped the rigid insulating foam for installation. The boards started out as 2"x4'x8', which was twice as wide as we needed, so we used the scoring on each board to split them in half to 2' wide. The engineering drawings stated that the foam was sealed in plastic, so we purchased a roll of black plastic sheeting and wrapped each of the 24 boards like they were presents.
On Monday the 17th we got the tractor to the site and started trenching at the North-West corner of the house. You can see the 5 pictures below. Digging was pretty easy as long as the centerline of the tractor was lined up with the trench line. Problems started to arise within the first 30 minutes, the water level in the bottom of the trench was increasing. We got most of the way along the back wall and then decided to stop for the day, because we were having some issues with dirt slumping back in the hole. We tried to bail some water out but it definitely was coming into the trench. All told it did not take that long (~3hrs) but with the wet ground and water issues we decided to level the bottom and hold off until another day.
So we skipped Tuesday and went to work..... :/ Our
friendly foreman Al (Bethy's Dad) went to the trench and bailed water
out. It seemed to not be too deep (3-4" at most) but also didn't seem
to really be subsiding either. Hopefully it will dry out before we fill
it with concrete.
On Wednesday the 19th we decided it was dry enough and hot enough to continue the trench. we got to the North-East corner which also necessitated our first attempt to get the tractor over the trench (and hopefully not ruin the trench or end up with a tractor in there either!). It was a little hairy at times but ultimately successful on both counts. So we rounded the corner and kept going.
About halfway through the day we got a random visit
from our friendly Town Building Inspector Gerry. He was glad to see us
all hard at work with no slacking going on. We showed him a bit of our
continuous water problem but he actually said that it looked fine and
that if it were a foot or more of water he would be worried, but 2 or 3
inches is nothing to worry about (cue sighs of relief). So on we went
and got close to the end before we finally called it a day with just a
few more feet on the west side to go.
On Sunday the 16th, the weather broke mid-way in the afternoon and we were able to hang some strings along our leveled plane. We used kite string for this purpose, as it was fine enough not to sag too much under its own weight but strong enough that it could be pulled tightly. We added 2 inches in each direction (so, overall dimensions of 36'x68') so that when we dig the footer trenches there is space for 2" insulating foam and 2" wooden forms around the perimeter of where the house will be sitting (as these materials are not structural and therefore should not bear any load). We then spray painted over the string to create outside lines to dig the trenches along.
After this, we prepped the rigid insulating foam for installation. The boards started out as 2"x4'x8', which was twice as wide as we needed, so we used the scoring on each board to split them in half to 2' wide. The engineering drawings stated that the foam was sealed in plastic, so we purchased a roll of black plastic sheeting and wrapped each of the 24 boards like they were presents.
On Monday the 17th we got the tractor to the site and started trenching at the North-West corner of the house. You can see the 5 pictures below. Digging was pretty easy as long as the centerline of the tractor was lined up with the trench line. Problems started to arise within the first 30 minutes, the water level in the bottom of the trench was increasing. We got most of the way along the back wall and then decided to stop for the day, because we were having some issues with dirt slumping back in the hole. We tried to bail some water out but it definitely was coming into the trench. All told it did not take that long (~3hrs) but with the wet ground and water issues we decided to level the bottom and hold off until another day.
 | |
| The Trench Begins |
 |
| We have to go down 3ft and luckily the shovel reaches |
 |
| Bucket of Dirt |
 |
| Hmmmm it may be a little wet |
 |
| Yep, definitely wet, this is what we got done for the day |
On Wednesday the 19th we decided it was dry enough and hot enough to continue the trench. we got to the North-East corner which also necessitated our first attempt to get the tractor over the trench (and hopefully not ruin the trench or end up with a tractor in there either!). It was a little hairy at times but ultimately successful on both counts. So we rounded the corner and kept going.
 |
| Some slumping evident from Monday |
 |
| Our First Corner!!! |
 |
| And what a nice Corner it is!!! |
Monday, June 17, 2013
If I had a Hammer...
I might need better insurance for the carpal tunnel that I would get from hammering in all the nails we need to build the walls. Oh so for those of you that don't know, when my father-in-law saw the final cost of what it would be to "Panelize" the walls before delivery to the site, he said "Walls aren't that hard to build." But since each wall will need a minimum of 50 nails per 4x8 sheet we decided it would be smart to get a nail gun! (ooooh aaaaah)
One afternoon while I was just blowing off time I went around to all the tool places that I could think of. Harbor Freight, Lowes, Sears, Home Depot and such. For a nail gun I was looking obviously at a pretty heavy duty Framing Nailer, which would also require an air compressor and various other attachments to make sure it is lubricated and stays in tip top shape.
The framing nailers that I saw at Harbor Freight were pretty cheap but I started thinking about how many nails we were really going to have to drive, it would be fine maybe if we were building a shed but for the house...maybe not. The consideration that we would be using it like a commercial builder for a couple weeks straight then lead me to the selection at the big box stores. It's pretty much the same at each one and you have a higher price point than HF obviously, but in this case I would pay for quality, because we could always sell it off afterward. The one that caught my eye was the Hitachi Framing Nailer. It is a good price and has great reviews online. Seems like the one I will pick up.
Next is a compressor and I wasn't overly leaning one way or another. One thing I did learn is that if you are doing heavy work (like framing a house!) you need a compressor with at least 4.5 cfm capabilities to save time and have the nailer works correctly every time. Most compressors that provide that kind of flow have either a larger tank or higher price tag. I think on this one I will go with the HF. A compressor can come in handy for a good many things so I wouldn't mind keeping this item.
Well that's all for this subject, let me know if you think I am on the right track with my thinking. It gets a little daunting when you are walking through the aisles looking at all the different pros and cons of each tool.
Friday, June 14, 2013
We just got a letter, we just got a letter
So in a thrilling follow-up to our post about putting up a mailbox... We got our first mail!


Okay, so actually this was all just a test. I sent Matt a piece of paper with a doodle on it at our new address to see whether it would go through. And guess what - it worked! The end.


Okay, so actually this was all just a test. I sent Matt a piece of paper with a doodle on it at our new address to see whether it would go through. And guess what - it worked! The end.
Tuesday, June 4, 2013
Building Permit: RECEIVED! Time to prep the site.
As the title of this post implies, as of May 30 we now have our building permit! HOORAY! Now that we finally have the go-ahead, we have begun work marking and leveling the site.


Now that we have the corners determined and the site relatively level (by sight only at this point), the next step is to determine what's truly level. We will do this by using a water level, which works on the principle that water always tries to find its own level. By filling a large bucket in the center of the area with water and filling a flexible tube with said water (with absolutely no bubbles), we can mark the water level on the tube and use that to determine a constant height in each of the corners. And, voila! We will have a level plane to work from. After that, we'll use the plane to mark out trenches and START DIGGING!
Updated budget:
+$504.80 - $10/sq ft for the building permit fee plus a $300 recreational fee
TOTAL SPENT SO FAR: $40,758.09

We started out simply by scraping away topsoil around the approximate footprint of the house. (You can see we have also had a bunch of lumber delivered for forms we will eventually build for when the footers are to be poured.) Next we placed stakes at the corners of the house, which we made sure were accurate by measuring lengths, widths, and diagonals.
That makes it sound nice and easy to place the corners, when in fact it was a lot of work, particularly because we want to make sure we are oriented as correctly as possible to solar south for when the solar array is installed. We used several different methods to make sure our alignments were correct: aligning to the shadow of a long (over 15'!) vertically level stick at exactly solar noon (as determined from sunrise/sunset times on a given date... but even those aren't entirely accurate due to varying definitions of true sunrise/sunset); measuring against magnetic north using the correct declination as obtained from the NOAA website; and even a little experiment using a giant pendulum. It turns out that all these methods were accurate to within about a half a degree of each other, and we couldn't really hope for better accuracy than that. After initially placing the corners, we hung string to make sure we were aligned to solar south and made adjustments as necessary until we had the most accurate and agreeable lengths, widths, diagonals, and alignments as we could realistically achieve. Phew!
Now that we have the corners determined and the site relatively level (by sight only at this point), the next step is to determine what's truly level. We will do this by using a water level, which works on the principle that water always tries to find its own level. By filling a large bucket in the center of the area with water and filling a flexible tube with said water (with absolutely no bubbles), we can mark the water level on the tube and use that to determine a constant height in each of the corners. And, voila! We will have a level plane to work from. After that, we'll use the plane to mark out trenches and START DIGGING!
Updated budget:
+$504.80 - $10/sq ft for the building permit fee plus a $300 recreational fee
TOTAL SPENT SO FAR: $40,758.09
Subscribe to:
Posts (Atom)